Tuesday, July 7, 2009

The Wheels and Tires Win! Well, almost.....


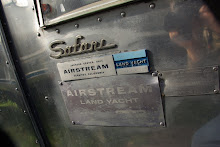
I was glad to spend at least one hour polishing this weekend. I am so limited in the time I can spend on it each Saturday/Sunday. I have other work I have to get done at the Park, I am outside and not under cover so weather/sun effects when I can polish, and I will not kill our mostly evening/night weekend social time. Heck, it is still the weekend after all! I work enough during the week, although we know Airstream "work" is not really "work". I am not using all of this as an excuse, as the time I get to spend polishing is during our glorious outdoor summer months. On Sunday I worked on the rear crown (end cap), and uninstalled one marker light. I removed the really hard and poorly installed black caulk/gunk from the top of the marker light with the help of Acetone. The old square marker lights will be replaced with teardrop marker lights that I believe '64 trailers could and/or would have had original from the factory. My current hypothosis is that a PO installed the end cap marker lights in the early 70's, as the old side markers from the factory are tear drops. Regardless, I like the looks of the tear drops better on a Vintage. Oh, and the above picture is after one pass of the grey compound (step #1), a light rain storm, with silver tape from http://www.vintagetrailersupply.com/.


So now to those #$%^ tires! 2 plus hours later I have the new tires and aluminum wheels installed. They look great now, but what a job getting them installed! The low riding Airstream with the small wheel wheel cut out area makes for one hell of a struggle getting new wheels and tires installed. The old wheels and tires came off without a hitch. The weight allowed each one to easily drop with gravity's help at a 45 degree angle away from the axle. Getting the new wheels and tires in was another story. My 81 year old neighbor actually came up with the best idea watching my struggles "why don't you take the air out of the tires?" It was a great idea, lessoned my struggles, but not entirely so. I fought the good fight, and finally won the battle, but those wheel wells did not give up very easily. In the end they are installed, and they do look good. Now I can go back to polishing and replacing exterior lights.


And here is the new long view. The exterior really looks great in this morning light right after a small rainstorm. Trust me, the interior is really pretty rough, and the smell of old mice p&p is rally hard to describe (yuk). But the exterior looks good, and even better with the new wheels and tires, and soon even better yet with a full polish!


Wednesday, June 24, 2009

Step 2.5 steps of 4 forward......


2.5 steps of 4 steps is really not exactly the whole truth. Truth be known any one step could be considered more than one step. We’re talking serious polishing here! Take for instance the first step. I used the gray abrasive and the closely sown 8” hard buff; both from Jestco. In order to take out the most of the linear scratches, I then use the grey abrasive with the 8” soft buff. So the abrasive is what I consider “a” step. In this case the gray abrasive compound is step #1.

Step #2 is with the red jeweler’s compound. I also use an 8” soft buff; although not the same buff that I use on step #1 part deux with the gray. Do not mix your abrasives, and clean between each step. I am using cotton cloth rags and a spray bottle of mineral spirits. Watch for hidden abrasive around the rivet heads. Trust me, you feel like crap when you newly scratch you’re just polished section with an abrasive from the last step. Wipe the entire surface not once, but twice. Use a new rag and new sections of the rag as you move through the cleaning. I am finding that the surface cleaning is key as you pick up much of the oxidized (black) residue in “total black rag when done” fashion. I also rock the polisher back and forth and you visibly see the scratches from step #1 begin to disappear. I am finding that step#2 is one longer step, and rather than the very fast single passes of step#1a and #1b.

Step #2.5 is actually part one of part three. I am using the duel cyclo with Nuvite F7. It looks like in order to cut through the remaining blemishes and scratches; I will need to run the cyclo over the whole works twice. For now I am doing it once. Thus, Step 2.5 of 4. Nuvite “S” is the plan for the last step. I hope to do steps 2.5 or 4 through the entirety of May, and when I am ready for the final touches, and then I will go back with one more step# 3 “F7” pass, and then finish with step #4 with“S”.

By the way, the picture is step #2. Can you see where I have already been with the red jeweler’s rouge over the rougher step #1?? Look at where the buff currently is and keep looking towards the left all the way to the frame on the back window. The bottom panel was completed last week. The bottom of the top panel is the focus. I finished steps 2.5 on the top panel in about 4 hours of work. Much faster than the learning I was doing on the bottom panel. I just wished I could tackle this more than the 4 hours per weekend that I am getting (if I am lucky).

Sunday, May 31, 2009

Polishing 101


I ended Saturday disappointed with how well the second phase of the polishing method (Jestco) was going, but I end Sunday much happier with today's results. The horizontal cloudy haze at the very bottom left of the shined panel is what I was fighting on Saturday on the whole panel. I have now found that in the second step with the polisher and red (jewelers rouge) if I move the soft buff back and forth, is starts to pull out the last of the major haze. So I now believe I am ready for step #3 & #4 on this panel, using the cyclo with Nuvite F7, and then Nuvite "S". The results for now using just the polisher and Jestco Grey then Red Rouge looks pretty darned good.


When you stand 4 feet away, you start to see the fine linear scratches that the F7 should take out. When you stand as far back as picture #2 (click to enlarge), the comparison between the polished (back left) panel and the rest of the Safari is clearly visible from this greater distance. And just think, this trailer had a what I will call a "rough polish" two years ago by the PO. Since it was only polished using a rotary polisher, you can clearly see the swirl marks in the other panets. Having said that, May's exterior is already in better shape than some 1964 era trailers that have never been touched. May is going to be one good looker when she is done. At this rate, that will be a while. I am only working on it weekends, and then no more than about 3 hours per day. I have other things to do of course, polishing gets tiring, and then I have to work when the sun is not shining on the back section I started on. I would say that I have 9-10 hours into it so far. It has been an education so far, and now that I am getting familiar with the tools and technique, I fully anticipate that it will go faster.

This last photo for today shows not only the "almost mirror shine" from the first two Jestco steps, but also the fact that I am replacing all of the exterior lights. I received my package of 5 red and 5 amber teardrop lights from http://www.vintagetrailersupply.com/ this week. I cannot say enough good things about the great customer service I've received working with them. The brand new bright red light covers against the tree reflection ends my weekend on a positive note. I look forward to continuing next weekend!


Sunday, May 17, 2009

And then there was progress….

Finally after what seems like months (OK, it was months) work on May has begun! It might not seem like polishing should be the first step, and in most cases it is not, but in my case it makes sense (to me at least). It has a lot to do with it being great weather for exterior work, and the fact that I want to shell to look it’s best, before touching the interior. Actually it will be more than just polishing. I will also be replacing the lights, which sounds easy, except all but two lights will need to be modified. More on that at another time.

I am reminded by my last post that I have not recapped the 4 Corners Unit Restoration Rally that we attended in Albuquerque a few weeks ago. Let me just say for now that it was 100% worth the trip. The one item of focus for today’s blog update is that the Rally changed how I was going to polish. “Levon” on the Airforums covered his seminar on polishing by showing us the “Jetsco” method. Basically you use “Buff’s” with compound or “Jewelers Rouge”. Since you use the edge of the buffs, and thus they turn up and down rather than swirl, these first steps do not create swirl marks (they do produce smaller up and down marks not noticed from a very few feet away). I will follow up he two steps of grey and red compound with two cyclos of “F7” and “S” from Nuvite.

You can tell by the picture where I have and where I have not started to shine. This is only after the first pass or two of Grey Compound. I have not touched around the light. The “haze” in the untouched parts is what I am removing. The reflection is not bad for such an early phase. I will be back at the polishing with a vengeance next weekend. I have to run for now, more soon.

Sunday, April 12, 2009

Winter is over! It just takes longer in Minnesota.


It is soon time to pull May from her winter storage location! I believe the farm road where she is stored has not yet dried to the point of being passable. I still found small pockets of snow in the woods this weekend, trying to hide from the 50’s temps. With the weather reports this week, that should change (dry out), and I will pull May out next weekend! The picture that I am posting here was actually taken last fall (you can tell cause there is green grass, and right now, all grass here is brown and just starting to green up). This will be the new summer home for May. It is located at the Minnesota Airstream Park. The truck is sitting about where May will be parked. I wouldn’t call that a lake in the distance (past the golf course), but it is bigger than a pond. Last spring two loons called it home, so it is a clean body of water. I should have taken a picture of the lot yesterday, but suffice to say all the leaves from this picture last October are cleaned up now. Once I move May to the lot, I need to first and foremost ensure that I have working running lights (brakes, turn signals, the necessities). Once I have lights, I will hall her up to Hart RV in Long Prairie for a new axel, brakes, wheels and tires. Then it is back to the Park, where all the polishing supplies that I just ordered from Vintage Trailer will be deployed to clean up and shine the exterior. The floor and interior will get tackled this fall/winter (at least that is the plan, but Vintage trailers need more time and money than one should assume, so stay tuned!) My posts should pick up now, including a recap of the Vintage Restoration Rally held by the Four Corners Unit of the WBCC. The rally is two weeks away in Albuquerque, New Mexico. We (wife and I) are flying down there for the long weekend, and are very much looking forward to it!

Wednesday, December 31, 2008

Can't you work on Airstream's in winter?


My good buddy Dave always likes to say "Get to work!" How I wish I could! We bought our Safari very late in the season (late October). It is currently stored (in a secret location) with several other Airstream's (OK, not that secret) near the Minnesota Airstream Park. You cannot easily access the location in winter, and it is 65 miles one way from my house. We will need to get the running lights working (or temporary lights to start), and the plan is to take it up to Hart's RV for a new axle, wheels, brakes, tires this spring. Hart's used to be an Airstream dealer, and they do great work, so check them out if you are in Minnesota (Long Prairie, MN). Once I can safely tow the Safari, then I have the option to bring it home, and begin the Full Monty! By the way, this picture does not include our Safari. It was taken last year at the same winter storage location, and our '90 Excella is the first 'Stream on the right. If we would have bought our Safari just a little sooner before winter, it would be in my driveway now. How I wish I could "get to work!"

Sunday, December 28, 2008

"Streamers" are the best!


I have now met online many great and helpful Streamers. The volume of information that is available on the Airforums, and the number of people documenting their projects in Blogs, is what makes it possible for those of us to exceed our own level of "handiness". Thus we are able to tackle projects that we would not otherwise be brave enough to tackle. As an example, in one of these online communications I met Roy who has refurbished/remodeled his '64 Safari. He had extra original cabinet knobs leftover from his project, and asked me if I could use them, and thus passed them along to me. They arrived well packed and with the attached letter. Just good folks helping all of us newbies along the way, with advise, or extra cabinet knobs. You can check out Roy's website covering his '64 Safari "Marlo" at http://64airstream.com/ Someday I will also "pay it forward", just like Roy did for me. Thank you Roy!